24/7 Emergency Service | Licensed & Insured | Upfront Pricing.
 Call Now: (786) 638-7923
24/7 Emergency Service | Licensed & Insured | Upfront Pricing.
Call Now: (786) 638-7923
Is your bathtub shower leaking, dripping, or lacking pressure? You're not alone. This comprehensive guide covers everything you need to know about bathtub shower plumbing, from simple DIY fixes to complex repairs that require a professional.
Before you can fix a problem, you need to understand the basic components and how they work together. A typical system consists of two main parts: the water supply that brings water in, and the drainage system that takes it out.
The supply side starts with hot and cold water lines that connect to your shower valve, which is controlled by the handle(s). When you turn the handle, the valve opens, allowing water to mix and flow through the showerhead or the bathtub spout. The diverter valve is what switches the flow between the two. On the drainage side, water goes down the drain, through the P-trap (a U-shaped pipe that holds water to prevent sewer gases from entering your home), and into the main sewer line. The overflow plate is connected to a tube that prevents the tub from overflowing. Understanding these components is crucial for accurate leak diagnosis.
The type of valve you have determines the repair approach. Cartridge valves are common in modern single-handle faucets; they use a movable cartridge to control water flow and temperature. Ball valves, found in some single-handle models, use a slotted ball inside a chamber. Two-handle setups often use compression valves, which work by raising and lowering a stem that presses a washer against a valve seat. Each type has its own common failure points—cartridges can wear out, ball valves can develop leaks from worn seals, and compression valves often have worn-out washers. Knowing your valve type is the first step in any faucet disassembly.
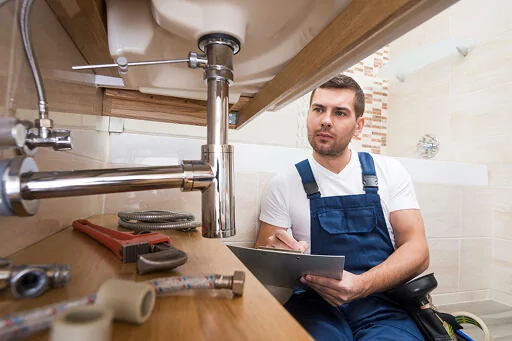
Accurate diagnosis is 90% of the repair. Here’s how to pinpoint the source of the most common issues.
A leak can waste hundreds of gallons of water. If water drips from the spout when the shower is on, the issue is likely a faulty diverter valve. If you see water coming from around the handle when the water is on, the problem is usually worn O-rings or a faulty cartridge. Water on the floor near the tub could point to leaks in the drain assembly or the overflow plate connections. For hidden leaks, a thorough leak diagnosis might involve removing the access panel (if you have one) to inspect the pipes and connections behind the wall.
Low water pressure only at the showerhead often indicates mineral buildup that can be cleaned. If pressure is low at both the shower and tub spout, the problem could be a faulty pressure balance valve or an issue with the home's main water pressure. Temperature fluctuations—especially sudden bursts of hot or cold water—are a classic sign of a failing pressure balance cartridge or a problem with your water heater. These issues are not just inconveniences; they can be safety hazards, particularly in households with children or elderly residents.
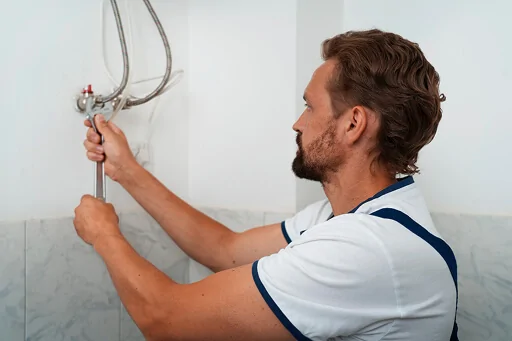
Once you've diagnosed the issue, you can proceed with the repair. Always turn off the water supply before starting any work.
A cartridge replacement is a common fix for leaks and temperature problems. After turning off the water, remove the handle (often secured by a setscrew hidden under a decorative cap). You’ll then see a retaining nut; remove it to pull out the old cartridge. It’s crucial to take the old cartridge to a hardware store to ensure you get an exact match. Before inserting the new cartridge, lubricate the new O-rings with plumbing grease. Reassemble the components, turn the water back on, and check for leaks. This repair can restore smooth operation and stop dripping effectively.
In older compression valves, a persistent drip is usually caused by a worn washer or a corroded valve seat. After disassembly, inspect the rubber washer at the end of the stem and replace it if it's frayed or hardened. If the drip continues, the valve seat that the washer presses against might be pitted. This requires a special valve seat wrench for removal and replacement. This type of seal replacement is a cost-effective way to fix a dripping spout without replacing the entire fixture.
If you're dealing with temperature fluctuations, consider upgrading your old valve to a modern pressure balance valve or a thermostatic valve. A pressure balance valve automatically adjusts to maintain a constant temperature if someone flushes a toilet elsewhere in the house. A thermostatic valve allows you to set an exact temperature. This upgrade requires more advanced plumbing skills, as it involves working behind the wall, but it significantly improves safety and comfort.
A slow or clogged drain is another frequent issue that can often be resolved without harsh chemicals.
Hair and soap scum are the primary culprits for drain clogs. Start by using a drain snake or an inexpensive "drain hair remover tool" to pull out the blockage. For tougher clogs, remove the overflow plate and use a drain snake down the overflow tube to reach the clog from above. Avoid chemical drain cleaners, as they can damage your pipes and P-trap. For persistent problems, a professional hydro-jetting service may be necessary to thoroughly clean the pipes.
If the drain is leaking or the pop-up stopper isn't working correctly, you may need to replace the entire drain assembly. This involves removing the old drain and installing a new one, which includes a new gasket to create a watertight seal between the drain and the tub. This repair requires a drain wrench and some patience but is very achievable as a DIY project and can resolve leaks and restore proper function.
The best way to avoid major repairs is through regular, simple maintenance.
Incorporate these tasks into your routine:
Monthly: Clean the showerhead with vinegar to remove mineral deposits and maintain water pressure. Quarterly: Check for leaks around handles, the spout, and the drain. Re-caulk around the tub and shower if the existing caulk is cracked or peeling. Annually: Test the pressure balance valve function and inspect visible pipes for signs of corrosion. Clean the aerator in the tub spout if applicable. H3: When to Call a Professional Plumber While many repairs are suitable for DIY, know your limits. Call a professional plumber for issues like: Leaks inside the wall that require cutting open tiles. No hot water throughout the house (indicating a water heater issue). Low water pressure throughout the entire home. Installing a new shower valve, which may require a permit and expertise to ensure it's up to code.